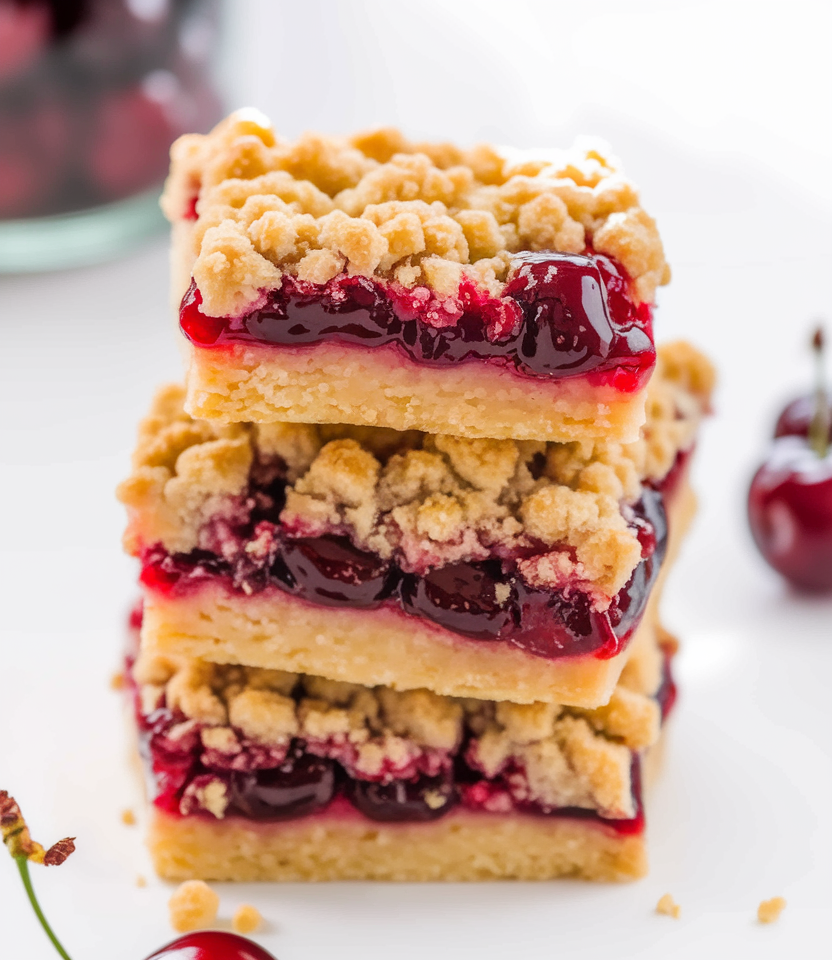
Looking for a dessert recipe that’s both simple and irresistibly delicious? Say hello to these BEST Cherry Bars! With a buttery, crumbly crust and a sweet cherry filling, they’re the perfect treat for any occasion. Whether you’re hosting a summer BBQ, a holiday gathering, or just craving something sweet, these bars will steal the show. Bonus: they’re super easy to make! 👩🍳✨
Why You’ll Love This Recipe
- Quick & Easy: Minimal prep time and simple ingredients!
- Homemade Goodness: Buttery crust paired with a luscious cherry filling.
- Versatile: Perfect for parties, picnics, or as an everyday dessert.
- Crowd-Pleaser: Loved by kids and adults alike!
Ingredients You’ll Need
To make these cherry bars, gather the following:
For the crust and topping:
- 1 cup unsalted butter, softened
- 2 cups granulated sugar
- 4 large eggs
- 1 tsp vanilla extract
- 3 cups all-purpose flour
- 1 tsp salt
For the filling:
- 2 cans (21 oz each) cherry pie filling
Step-by-Step Instructions
1. Preheat & Prep:
Preheat your oven to 350°F (175°C). Grease a 9×13-inch baking pan or line it with parchment paper for easy removal.
2. Make the Crust & Topping:
In a large bowl, cream together the softened butter and sugar until light and fluffy. Add the eggs one at a time, mixing well after each addition. Stir in the vanilla extract.
Gradually add the flour and salt, mixing until the dough is just combined. Reserve 1 1/2 cups of the dough for the topping and set aside. Press the remaining dough evenly into the prepared baking pan.
3. Add the Cherry Filling:
Spread the cherry pie filling evenly over the crust layer.
4. Crumble the Topping:
Take the reserved dough and crumble it over the cherry filling. Aim for an even layer of crumbly goodness!
5. Bake to Perfection:
Bake in the preheated oven for 40-45 minutes, or until the top is golden brown. Let the bars cool completely before cutting into squares.
Tips for Success
- Use High-Quality Cherry Filling: The better the filling, the tastier your bars will be! Opt for a premium brand or homemade cherry filling.
- Add a Twist: Love almond flavor? Add 1/2 tsp of almond extract to the crust for an extra flavor boost.
- Don’t Overbake: Keep an eye on the bars to ensure the crust stays soft and buttery.
FAQs
Can I use fresh cherries instead of pie filling?
Absolutely! Cook fresh or frozen cherries with sugar and cornstarch to create a thick filling.
How do I store cherry bars?
Store them in an airtight container at room temperature for up to 3 days, or refrigerate for up to a week.
Can I freeze them?
Yes! Wrap the bars individually in plastic wrap and store them in a freezer-safe container for up to 3 months. Thaw at room temperature before serving.
Perfect for Pinterest! 📌
Love this recipe? Don’t forget to save it for later! Click the Pin It button below and share these delectable cherry bars with your Pinterest followers.
Final Thoughts
These BEST Cherry Bars are more than just a dessert—they’re a slice of joy! With their buttery crust and juicy cherry filling, they’ll quickly become a family favorite. Whether you’re baking for a party or treating yourself, this recipe guarantees sweet success every time.
Ready to bake? Let me know how they turn out in the comments below! And don’t forget to pin this recipe to your favorite dessert board!


Leave a Reply