Easy No-Bake Granola Bars for a Healthy Snack On-the-Go
If you’re looking for a quick, wholesome snack that doesn’t require turning on the oven, these Easy No-Bake Granola Bars are the perfect answer. Whether you’re packing lunchboxes, prepping snacks for the week, or just need something satisfying between meals, this recipe is a tried-and-true favorite in my kitchen. Made with simple pantry staples, they come together in just minutes and hold up beautifully in the fridge.
Why You’ll Love This Recipe
These no-bake granola bars are chewy, slightly sweet, and endlessly customizable. They’re kid-approved, adult-friendly, and far better than most store-bought bars loaded with preservatives. Best of all, you can whip them up with zero baking experience.
| Servings: 12 bars | Prep Time: 10 minutes | Cook Time: 0 minutes | Chill Time: 30 minutes | Total Time: 40 minutes |
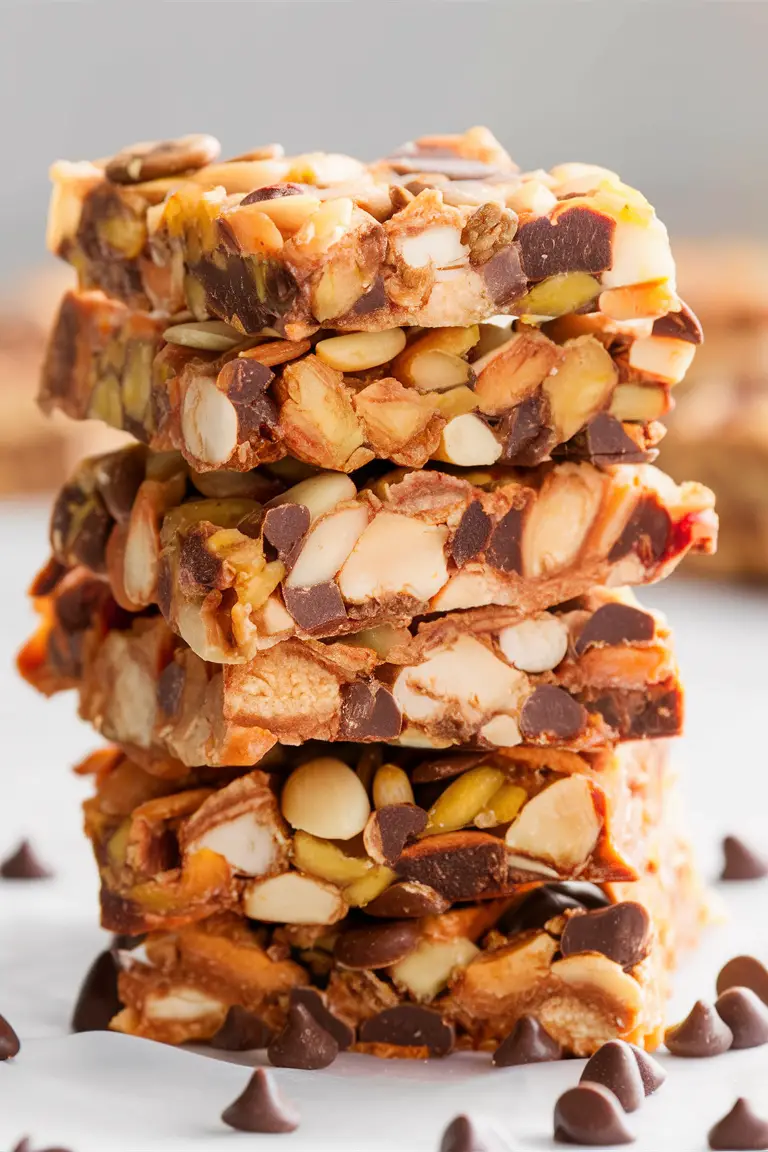
Ingredients
- 2 cups old-fashioned rolled oats
- 1 cup crispy rice cereal
- 1/2 cup peanut butter (or almond butter)
- 1/3 cup honey or maple syrup
- 1/4 cup brown sugar (optional, for extra sweetness)
- 1/2 teaspoon vanilla extract
- 1/3 cup mini chocolate chips
- 1/4 teaspoon salt
Instructions
- Line an 8×8 inch baking dish with parchment paper and set aside.
- In a medium saucepan over low heat, stir together the peanut butter, honey, and brown sugar until smooth and just warm. Remove from heat and stir in the vanilla and salt.
- In a large mixing bowl, combine the oats and crispy rice cereal. Pour the warm mixture over the dry ingredients and stir until evenly coated.
- Let the mixture cool for 5 minutes, then gently fold in the mini chocolate chips.
- Transfer the mixture to the prepared dish and press down firmly using the back of a spatula or clean hands.
- Chill in the refrigerator for at least 30 minutes before slicing into bars.
Tips for Success
- Use parchment paper: This makes it much easier to remove and slice the bars.
- Press firmly: Really pack the mixture into the pan to help the bars hold together.
- Chill thoroughly: Don’t skip the chilling step—this is what firms the bars and prevents them from crumbling.
- Cut with a sharp knife: A clean, sharp knife ensures nice, even bars.
Variations to Try
- Nut-Free: Use sunflower seed butter and skip the nuts for a school-safe version.
- Add-ins: Mix in shredded coconut, chopped dried fruit, or chopped nuts for extra flavor and texture.
- Chocolate Drizzle: Melt some dark chocolate and drizzle it over the top before chilling for a dessert-like treat.
- Protein Boost: Add a scoop of your favorite protein powder to the mix.
FAQs
How long do no-bake granola bars last?
Stored in an airtight container in the fridge, these bars will last up to 7 days. You can also freeze them for up to 2 months.
Can I use quick oats instead of rolled oats?
Yes, quick oats will work, but the texture will be slightly softer and less chewy.
Do I have to use brown sugar?
Not at all. You can skip it if your sweetener is already enough for your taste. Just taste the mixture before pressing it into the pan.
Can I make these vegan?
Absolutely. Use maple syrup instead of honey and choose a plant-based nut butter.
Why are my bars falling apart?
This usually happens if the mixture wasn’t pressed firmly enough or wasn’t chilled long enough. Make sure to really pack it down and refrigerate thoroughly.
Related Post: Healthy Banana Oatmeal Muffins
Final Thoughts
These no-bake granola bars are one of those recipes that never fail. They’re simple, quick, and easy to customize with whatever you have in your pantry. Perfect for busy mornings, after-school snacks, or a mid-hike energy boost, these bars check all the boxes. Once you make them, you’ll wonder why you ever bought granola bars from the store.
Give them a try this week and let me know how you customize yours. Happy snacking!